Wednesday, May 27, 2009

Streudel


The May Daring Bakers’ challenge was hosted by Linda of make life sweeter! and Courtney of Coco Cooks. They chose Apple Strudel from the recipe book Kaffeehaus: Exquisite Desserts from the Classic Cafés of Vienna, Budapest and Prague by Rick Rodgers.

What I really enjoy most about the Daring Bakers is that they take you out of your comfort zone and hurl challenges that are exactly that: tasks that push you to take that plunge and rise to the occasion.  Well, this time, it was apple streudel and making the streudel dough by hand.

Although I’ve had my fair share of making different kinds of dough, I’ve always steered clear of streudel. Leave it to the pro pastry makers!  First of all, it did seem exceedingly laborious. Secondly, the sheerness of the dough made me feel like my nails would always slice them with each pass.  (Yes, despite my many forays in the kitchen, my nails remain long!)

This dough however was surprisingly easy to work with, and was responsive the the faintest manipulations of the hand.  It stretched to a rectangle of about 20x30. I turned out a well shaped, crusty streudel without a hitch.

I went for a savory streudel and didn't have time to make another one but the apple streudel will find it's way into my kitchen very soon.

I filled my streudel with pancetta, ricotta, almonds, portabello slices, oven roasted tomatoes and basil. This filling will also be a recurring theme in streudel!

Check out the other daring bakers and their concoctions at the daring kitchen.


(Please also read the tips and notes on the trial runs Courtney and I did. You'll find them below the recipes.)

Preparation time
Total: 2 hours 15 minutes – 3 hours 30 minutes

15-20 min to make dough
30-90 min to let dough rest/to prepare the filling
20-30 min to roll out and stretch dough
10 min to fill and roll dough
30 min to bake
30 min to cool

Apple strudel
from “Kaffeehaus – Exquisite Desserts from the Classic Cafés of Vienna, Budapest and Prague” by Rick Rodgers

2 tablespoons (30 ml) golden rum
3 tablespoons (45 ml) raisins
1/4 teaspoon ground cinnamon
1/3 cup plus 1 tablespoon (80 g) sugar
1/2 cup (1 stick / 115 g) unsalted butter, melted, divided
1 1/2 cups (350 ml) fresh bread crumbs
strudel dough (recipe below)
1/2 cup (120 ml, about 60 g) coarsely chopped walnuts
2 pounds (900 g) tart cooking apples, peeled, cored and cut into ¼ inch-thick slices (use apples that hold their shape during baking)

1. Mix the rum and raisins in a bowl. Mix the cinnamon and sugar in another bowl.

2. Heat 3 tablespoons of the butter in a large skillet over medium-high. Add the breadcrumbs and cook whilst stirring until golden and toasted. This will take about 3 minutes. Let it cool completely.

3. Put the rack in the upper third of the oven and preheat the oven to 400°F (200°C). Line a large baking sheet with baking paper (parchment paper). Make the strudel dough as described below. Spread about 3 tablespoons of the remaining melted butter over the dough using your hands (a bristle brush could tear the dough, you could use a special feather pastry brush instead of your hands). Sprinkle the buttered dough with the bread crumbs. Spread the walnuts about 3 inches (8 cm) from the short edge of the dough in a 6-inch-(15cm)-wide strip. Mix the apples with the raisins (including the rum), and the cinnamon sugar. Spread the mixture over the walnuts.

4. Fold the short end of the dough onto the filling. Lift the tablecloth at the short end of the dough so that the strudel rolls onto itself. Transfer the strudel to the prepared baking sheet by lifting it. Curve it into a horseshoe to fit. Tuck the ends under the strudel. Brush the top with the remaining melted butter.

5. Bake the strudel for about 30 minutes or until it is deep golden brown. Cool for at least 30 minutes before slicing. Use a serrated knife and serve either warm or at room temperature. It is best on the day it is baked.

Strudel dough
from “Kaffeehaus – Exquisite Desserts from the Classic Cafés of Vienna, Budapest and Prague” by Rick Rodgers

1 1/3 cups (200 g) unbleached flour
1/8 teaspoon salt
7 tablespoons (105 ml) water, plus more if needed
2 tablespoons (30 ml) vegetable oil, plus additional for coating the dough
1/2 teaspoon cider vinegar

1. Combine the flour and salt in a stand-mixer fitted with the paddle attachment. Mix the water, oil and vinegar in a measuring cup. Add the water/oil mixture to the flour with the mixer on low speed. You will get a soft dough. Make sure it is not too dry, add a little more water if necessary.
Take the dough out of the mixer. Change to the dough hook. Put the dough ball back in the mixer. Let the dough knead on medium until you get a soft dough ball with a somewhat rough surface.

2. Take the dough out of the mixer and continue kneading by hand on an unfloured work surface. Knead for about 2 minutes. Pick up the dough and throw it down hard onto your working surface occasionally.
Shape the dough into a ball and transfer it to a plate. Oil the top of the dough ball lightly. Cover the ball tightly with plastic wrap. Allow to stand for 30-90 minutes (longer is better).

3. It would be best if you have a work area that you can walk around on all sides like a 36 inch (90 cm) round table or a work surface of 23 x 38 inches (60 x 100 cm). Cover your working area with table cloth, dust it with flour and rub it into the fabric. Put your dough ball in the middle and roll it out as much as you can.
Pick the dough up by holding it by an edge. This way the weight of the dough and gravity can help stretching it as it hangs. Using the back of your hands to gently stretch and pull the dough. You can use your forearms to support it.

4. The dough will become too large to hold. Put it on your work surface. Leave the thicker edge of the dough to hang over the edge of the table. Place your hands underneath the dough and stretch and pull the dough thinner using the backs of your hands. Stretch and pull the dough until it's about 2 feet (60 cm) wide and 3 feet (90 cm) long, it will be tissue-thin by this time. Cut away the thick dough around the edges with scissors. The dough is now ready to be filled.

Tips
- Ingredients are cheap so we would recommend making a double batch of the dough, that way you can practice the pulling and stretching of the dough with the first batch and if it doesn't come out like it should you can use the second batch to give it another try;
- The tablecloth can be cotton or polyster;
- Before pulling and stretching the dough, remove your jewelry from hands and wrists, and wear short-sleeves;
- To make it easier to pull the dough, you can use your hip to secure the dough against the edge of the table;
- Few small holes in the dough is not a problem as the dough will be rolled, making (most of) the holes invisible.


Saturday, May 16, 2009

A Daring Cook Puts on her Toque!

Okay, I don't have a toque but I would have wanted to wear one to herald the birth of the DARING COOKS!  Liz and Ivonne have done it again! Not only have they produced a spanking new website, the daring kitchen they also improved the concept and introduced the daring cooks!  Now we won’t only delight you with baked goodies but just about anything that can and will come out of a kitchen!

To start off the group, Liz and Ivonne hosted the very first Daring Cooks challenge with a very interesting choice---Ricotta Gnocchi.  I’ve tried my hand at making both Gnocchi (potato) and Ricotta and the combination made me swoon. 

I tried a recipe for ricotta given by Audax Artiflex using skim milk powder. The ricotta turned out quite dry and nice but the taste of my skim milk was not to my liking.  I decided to make Ricotta using whole milk in the recipe from Epicurious. This had a wonderfully mild flavor and delicate texture. I let it drain for 24 hours.  This was not enough.  I ended up with a fabulous tasting ricotta that was too wet to make gnocchi.   I had to alter the recipe as I was serving it for dinner.  I found another recipe that integrated flour into the dough.  This formed well however the taste of the ricotta was altered by the introduction of the flour.   I’ll try making it again with ricotta that I will drain for 48 hours!

For the sauce, I sautéed some portabello and button mushrooms in olive oil, bay leaves and thyme.  I also cooked some spinach sous-vide with butter and nutmeg.  I layered these on with some prosciutto and grated parmesan and decorated them with organic flowers.

Buon appetito!


Zuni Ricotta Gnocchi

Source: From The Zuni Café Cookbook.

Yield: Makes 40 to 48 gnocchi (serves 4 to 6)

Prep time: Step 1 will take 24 hours. Steps 2 through 4 will take approximately 1 hour.

Equipment required:

- Sieve
- Cheesecloth or paper towels
- Large mixing bowl
- Rubber spatula
- Tablespoon
- Baking dish or baking sheet
- Wax or parchment paper
- Small pot
- Large skillet
- Large pan or pot (very wide in diameter and at least 2 inches deep)

For the gnocchi:

1 pound (454 grams/16 ounces) fresh ricotta (2 cups)
2 large cold eggs, lightly beaten
1 tablespoon (1/2 ounce) unsalted butter
2 or 3 fresh sage leaves, or a few pinches of freshly grated nutmeg, or a few pinches of chopped lemon zest (all optional)
½ ounce Parmigiano-Reggiano, grated (about ¼ cup very lightly packed)
about ¼ teaspoon salt (a little more if using kosher salt)
all-purpose flour for forming the gnocchi

For the gnocchi sauce:

8 tablespoons (227 grams/1/4 pound/4 ounces) butter, sliced
2 teaspoons water

Step 1 (the day before you make the gnocchi): Preparing the ricotta.

If the ricotta is too wet, your gnocchi will not form properly. In her cookbook, Judy Rodgers recommends checking the ricotta’s wetness. To test the ricotta, take a teaspoon or so and place it on a paper towel. If you notice a very large ring of dampness forming around the ricotta after a minute or so, then the ricotta is too wet. To remove some of the moisture, line a sieve with cheesecloth or paper towels and place the ricotta in the sieve. Cover it and let it drain for at least 8 hours and up to 24 hours in the refrigerator. Alternatively, you can wrap the ricotta carefully in cheesecloth (2 layers) and suspend it in your refrigerator for 8 to 24 hours with a bowl underneath to catch the water that’s released. Either way, it’s recommended that you do this step the day before you plan on making the gnocchi.

Step 2 (the day you plan on eating the gnocchi): Making the gnocchi dough.

To make great gnocchi, the ricotta has to be fairly smooth. Place the drained ricotta in a large bowl and mash it as best as you can with a rubber spatula or a large spoon (it’s best to use a utensil with some flexibility here). As you mash the ricotta, if you noticed that you can still see curds, then press the ricotta through a strainer to smooth it out as much as possible.

Add the lightly beaten eggs to the mashed ricotta.

Melt the tablespoon of butter. As it melts, add in the sage if you’re using it. If not, just melt the butter and add it to the ricotta mixture.

Add in any flavouring that you’re using (i.e., nutmeg, lemon zest, etc.). If you’re not using any particular flavouring, that’s fine.

Add the Parmigiano-Reggiano and the salt.

Beat all the ingredients together very well. You should end up with a soft and fluffy batter with no streaks (everything should be mixed in very well).

Step 3: Forming the gnocchi.

Fill a small pot with water and bring to a boil. When it boils, salt the water generously and keep it at a simmer. You will use this water to test the first gnocchi that you make to ensure that it holds together and that your gnocchi batter isn’t too damp.

In a large, shallow baking dish or on a sheet pan, make a bed of all-purpose flour that’s ½ an inch deep.

With a spatula, scrape the ricotta mixture away from the sides of the bowl and form a large mass in the centre of your bowl.

Using a tablespoon, scoop up about 2 to 3 teaspoons of batter and then holding the spoon at an angle, use your finger tip to gently push the ball of dough from the spoon into the bed of flour.

At this point you can either shake the dish or pan gently to ensure that the flour covers the gnocchi or use your fingers to very gently dust the gnocchi with flour. Gently pick up the gnocchi and cradle it in your hand rolling it to form it in an oval as best as you can, at no point should you squeeze it. What you’re looking for is an oval lump of sorts that’s dusted in flour and plump.

Gently place your gnocchi in the simmering water. It will sink and then bob to the top. From the time that it bobs to the surface, you want to cook the gnocchi until it’s just firm. This could take 3 to 5 minutes.

If your gnocchi begins to fall apart, this means that the ricotta cheese was probably still too wet. You can remedy this by beating a teaspoon of egg white into your gnocchi batter. If your gnocchi batter was fluffy but the sample comes out heavy, add a teaspoon of beaten egg to the batter and beat that in. Test a second gnocchi to ensure success.

Form the rest of your gnocchi. You can put 4 to 6 gnocchi in the bed of flour at a time. But don’t overcrowd your bed of flour or you may damage your gnocchi as you coat them.

Have a sheet pan ready to rest the formed gnocchi on. Line the sheet pan with wax or parchment paper and dust it with flour.

You can cook the gnocchi right away, however, Judy Rodgers recommends storing them in the refrigerator for an hour prior to cooking to allow them to firm up.

Step 4: Cooking the gnocchi.

Have a large skillet ready to go. Place the butter and water for the sauce in the skillet and set aside.

In the largest pan or pot that you have (make sure it’s wide), bring at least 2 quarts of water to a boil (you can use as much as 3 quarts of water if your pot permits). You need a wide pot or pan so that your gnocchi won’t bump into each other and damage each other.

Once the water is boiling, salt it generously.

Drop the gnocchi into the water one by one. Once they float to the top, cook them for 3 to 5 minutes (as in the case with the test gnocchi).

When the gnocchi float to the top, you can start your sauce while you wait for them to finish cooking.

Place the skillet over medium heat and melt the butter. Swirl it gently a few times as it melts. As soon as it melts and is incorporated with the water, turn off the heat. Your gnocchi should be cooked by now.

With a slotted spoon, remove the gnocchi from the boiling water and gently drop into the butter sauce. Carefully roll in the sauce until coated. Serve immediately.

Freezing the gnocchi: If you don’t want to cook your gnocchi right away or if you don’t want to cook all of them, you can make them and freeze them. Once they are formed and resting on the flour-dusted, lined tray, place them uncovered in the freezer. Leave them for several hours to freeze. Once frozen, place them in a plastic bag. Remove the air and seal the bag. Return to the freezer. To cook frozen gnocchi, remove them from the bag and place individually on a plate or on a tray. Place in the refrigerator to thaw completely. Cook as directed for fresh gnocchi.

Monday, April 27, 2009

White Chocolate Cheesecake


The April 2009 challenge is hosted by Jenny from Jenny Bakes. She has chosen Abbey's Infamous Cheesecake as the challenge.

I love cheesecake: New York, lighter cream cheesecakes, baked ones, unbaked ones, cake based ones, graham cacker crusted ones, oreo crusted, cream topped, sour cream topped, fruit topped, name it, I LOVE IT! 

Given all the varieties of cheesecake, it was difficult to choose what to do for this daring baker challenge. I ended up with a white chocolate cheesecake with strawberries and cream. I always liked white chocolate cheesecakes but I usually make t quite light.  This time, Abbey's recipe was a dense heavy but creamy texture that complemented the 8 oz of melted white chocolate couverture that I added to it. I also excluded the lemon.  

It was an absolute dream.  The white chocolate just added a hint of a surprise-a tinge of sweetness to counter the tang of the cream cheese. Top it with strawberries and it couldn't be More perfect! THANK YOU JENNY from JennyBakes.com for another great challenge! 


Abbey's Infamous Cheesecake:

crust:
2 cups / 180 g graham cracker crumbs
1 stick / 4 oz butter, melted
2 tbsp. / 24 g sugar
1 tsp. vanilla extract

cheesecake:
3 sticks of cream cheese, 8 oz each (total of 24 oz) room temperature
1 cup / 210 g sugar
3 large eggs
1 cup / 8 oz heavy cream
1 tbsp. lemon juice
1 tbsp. vanilla extract (or the innards of a vanilla bean)
1 tbsp liqueur, optional, but choose what will work well with your cheesecake

DIRECTIONS:
1. Preheat oven to 350 degrees F (Gas Mark 4 = 180C = Moderate heat). Begin to boil a large pot of water for the water bath.

2. Mix together the crust ingredients and press into your preferred pan. You can press the crust just into the bottom, or up the sides of the pan too - baker's choice. Set crust aside.

3. Combine cream cheese and sugar in the bowl of a stand-mixer (or in a large bowl if using a hand-mixer) and cream together until smooth. Add eggs, one at a time, fully incorporating each before adding the next. Make sure to scrape down the bowl in between each egg. Add heavy cream, vanilla, lemon juice, and alcohol and blend until smooth and creamy.

4. Pour batter into prepared crust and tap the pan on the counter a few times to bring all air bubbles to the surface. Place pan into a larger pan and pour boiling water into the larger pan until halfway up the side of the cheesecake pan. If cheesecake pan is not airtight, cover bottom securely with foil before adding water.

5. Bake 45 to 55 minutes, until it is almost done - this can be hard to judge, but you're looking for the cake to hold together, but still have a lot of jiggle to it in the center. You don't want it to be completely firm at this stage. Close the oven door, turn the heat off, and let rest in the cooling oven for one hour. This lets the cake finish cooking and cool down gently enough so that it won't crack on the top. After one hour, remove cheesecake from oven and lift carefully out of water bath. Let it finish cooling on the counter, and then cover and put in the fridge to chill. Once fully chilled, it is ready to serve.

Saturday, February 28, 2009

Chocolate Decadence

The February 2009 challenge is hosted by Wendy of WMPE's blog and Dharm of Dad ~ Baker & Chef.
We have chosen a Chocolate Valentino cake by Chef Wan; a Vanilla Ice Cream recipe from Dharm and a Vanilla Ice Cream recipe from Wendy as the challenge.

I love flourless chocolate cakes.  They are quick to make/bake, and deliciously sinful. Once you find a good recipe, you just keep using it.  Then because of the daring bakers, I had to make this one---and now there's no looking back.  This is the GEM of all recipes. It's simplicity of ingredients makes it pure goodness.  Three ingredients are all it takes: Chocolate gives it flavor, butter gives it an intense moistness and the eggs give it texture. 

I had just purchased a silicone pyramid mould and so I baked my cake in this shape in lieu of hearts.  The dark chocolate couverture
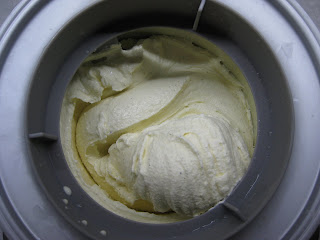
cake was served with vanilla ice cream and caramel sauce. I also wanted to play with some chocolate transfers so I covered one cake with pure chocolate.  

This cake was so good I had to make it twice---the first didn't even get photographed! 

Thanks to Wendy and Dharm for a great challenge!

CHOCOLATE VALENTINO 
16 oz (454 g) chocolate , roughly chopped
1/2 cup + 2 Tablespoons (146 g) unsalted butter
5 large eggs separated

1. Melt chocolate and butter on top of a double broiler, stirring often. 
2. While chocolate is cooling, line your pan with parchment and butter.
3. Place whites in a bowl. Whip egg whites till stiff peaks form (do not over-whip or cake will be dry).
4. Beat yolks together in a different bowl. Add to cooled chocolate.
5. Fold in 1/3 of the egg whites into the chocolate mixture and follow with the remaining 2/3 whites. Fold until no whites remain without deflating the batter.
6. Pour batter into prepared pan 3/4 full and bake at 375F/190C
7. Bake for 25 minutes. Cool on a rack for 10 minutes and unmold.

VANILLA ICE CREAM adapted from David Lebovitz
1 cup whole milk
1/2 cup sugar
2 cups cream
1 vanilla bean split in half
6 egg yolks

1. Heat milk, sugar and 1 cup cream and vanilla bean. Remove from heat and let steep for 30 minutes. 
2. Whisk egg yolks. Slowly add milk mixture to the yolks.  Return to heat and stir until the custard coats the back of a spoon.
3. Place remaining 1 cup cream in a bowl and set a mesh strainer above it. Pour the egg mixture into the cream. Refrigerate and then freeze according to manufacturer's instruction.


Thursday, January 29, 2009

Twirling Tuiles

Daring bakers are twirling tuiles in January and from what I've seen, the results will make your head spin in amazement! This month's challenge is brought to us by Karen of Bake My Day and Zorra of 1x umruehren bitte aka Kochtopf. They have chosen Tuiles from The Chocolate Book by Angélique  Schmeink and Nougatine and Chocolate Tuiles from Michel Roux.

Though relatively easy to make, one would think, it was a little tricky.  I opted to make the savory tuiles (from "the French Laundry Cookbook" by Thomas Keller)  flavored with cracked black pepper and topped with smoked salmon and avocado to serve as appetizers for a dinner i was hosting. I also served an olive oil ice cream so I had spare egg whites around the kitchen. First No-No! I don't think day old egg really work, perhaps with the exception of the macarron which I've not dared to try yet...

The first batch I made already had a texture that didn't spread very well. Though it didn't, I felt it was separating or liquefying and needed some 'kelvinating' 911. Then every single piece broke as I tried to roll it over a makeshift tin foil cornet mould. Figuring on the eggs as the culprit, I cracked another two eggs and whipped up a second batch. These tuiles came out much better, formed easily and were devoured easily too! 

Thank you to Karen and Zorra for a great spin!

SAVORY TUILES  adapted from Thomas Keller

1/4 Cup + 3 tablespoons (65 g) all purpose flour
1 tablespoon plus 1 teaspoon sugar
1 teaspoon kosher salt (2/3 teaspoon table salt)
8 tablespoons unsalted butter, softened but cool to the touch
2 large egg whites, cold
cracked black pepper

In a medium bowl, mix together the flour, sugar and salt. In a separate bowl, whisk the butter until it is completely smooth and mayonnaise like in texture. Using a spatula, beat the egg whites into the dry ingredients until completely incorporated and smooth. Whisk in the softened butter by thirds, until batter is creamy.

Preheat oven to 400 degrees F.

Make a 4" hollow circular stencil. Place the stencil on the silpat and spread batter in an even layer. There should be no holes in the batter. Lift the stencil and repeat the process to make as many rounds as you have moulds or to fill the silpat. Sprinkle with  freshly cracked black pepper.

Place silpat on a heavy baking sheet and bake for about 4 minutes until batter is set and you see it ripling from the heat. The cornets may have browned in some areas but they will not be evenly browned. 

Open the oven door and place the baking sheet on the door.***This will help keep the cornets warm as you roll them to prevent them from becoming too stiff to roll. Flip a cornet over the sheet pan and place a 4 1/2 inch cornet mould at the bottom of the round. If you are right handed, you will want the narrow side to your left. The tip of the mould should touch the lower left edge (7 o'clock) of the cornet.

Fold the bottom of the cornet and around the mould. Arrange the cornets, seam side down on the pan so they lean against each other to prevent rolling. Bake for another 2-3 minutes until cornets are golden brown. Remove from oven and cool for 30 seconds or so.
Gently remove the cornets from the moulds and cool for several minutes on a paper towel. Stores up to 2 days in an airtight container.

SMOKED SALMON AND AVOCADO FILLING
100g finely diced smoked salmon
1 small ripe avocado
olive oil
lemon juice
salt 
pepper

combine all ingredients just before serving and scoop into the cornets. Garnish with chives.  I served my cornets in little glasses on a bright plate. Enjoy!