Saturday, February 28, 2009

Chocolate Decadence

The February 2009 challenge is hosted by Wendy of WMPE's blog and Dharm of Dad ~ Baker & Chef.
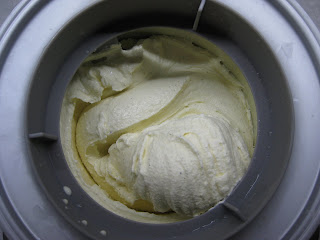
We have chosen a Chocolate Valentino cake by Chef Wan; a Vanilla Ice Cream recipe from Dharm and a Vanilla Ice Cream recipe from Wendy as the challenge.

I love flourless chocolate cakes.  They are quick to make/bake, and deliciously sinful. Once you find a good recipe, you just keep using it.  Then because of the daring bakers, I had to make this one---and now there's no looking back.  This is the GEM of all recipes. It's simplicity of ingredients makes it pure goodness.  Three ingredients are all it takes: Chocolate gives it flavor, butter gives it an intense moistness and the eggs give it texture. 

I had just purchased a silicone pyramid mould and so I baked my cake in this shape in lieu of hearts.  The dark chocolate couverture
cake was served with vanilla ice cream and caramel sauce. I also wanted to play with some chocolate transfers so I covered one cake with pure chocolate.  

This cake was so good I had to make it twice---the first didn't even get photographed! 

Thanks to Wendy and Dharm for a great challenge!

CHOCOLATE VALENTINO 
16 oz (454 g) chocolate , roughly chopped
1/2 cup + 2 Tablespoons (146 g) unsalted butter
5 large eggs separated

1. Melt chocolate and butter on top of a double broiler, stirring often. 
2. While chocolate is cooling, line your pan with parchment and butter.
3. Place whites in a bowl. Whip egg whites till stiff peaks form (do not over-whip or cake will be dry).
4. Beat yolks together in a different bowl. Add to cooled chocolate.
5. Fold in 1/3 of the egg whites into the chocolate mixture and follow with the remaining 2/3 whites. Fold until no whites remain without deflating the batter.
6. Pour batter into prepared pan 3/4 full and bake at 375F/190C
7. Bake for 25 minutes. Cool on a rack for 10 minutes and unmold.

VANILLA ICE CREAM adapted from David Lebovitz
1 cup whole milk
1/2 cup sugar
2 cups cream
1 vanilla bean split in half
6 egg yolks

1. Heat milk, sugar and 1 cup cream and vanilla bean. Remove from heat and let steep for 30 minutes. 
2. Whisk egg yolks. Slowly add milk mixture to the yolks.  Return to heat and stir until the custard coats the back of a spoon.
3. Place remaining 1 cup cream in a bowl and set a mesh strainer above it. Pour the egg mixture into the cream. Refrigerate and then freeze according to manufacturer's instruction.


Thursday, January 29, 2009

Twirling Tuiles

Daring bakers are twirling tuiles in January and from what I've seen, the results will make your head spin in amazement! This month's challenge is brought to us by Karen of Bake My Day and Zorra of 1x umruehren bitte aka Kochtopf. They have chosen Tuiles from The Chocolate Book by Angélique  Schmeink and Nougatine and Chocolate Tuiles from Michel Roux.

Though relatively easy to make, one would think, it was a little tricky.  I opted to make the savory tuiles (from "the French Laundry Cookbook" by Thomas Keller)  flavored with cracked black pepper and topped with smoked salmon and avocado to serve as appetizers for a dinner i was hosting. I also served an olive oil ice cream so I had spare egg whites around the kitchen. First No-No! I don't think day old egg really work, perhaps with the exception of the macarron which I've not dared to try yet...

The first batch I made already had a texture that didn't spread very well. Though it didn't, I felt it was separating or liquefying and needed some 'kelvinating' 911. Then every single piece broke as I tried to roll it over a makeshift tin foil cornet mould. Figuring on the eggs as the culprit, I cracked another two eggs and whipped up a second batch. These tuiles came out much better, formed easily and were devoured easily too! 

Thank you to Karen and Zorra for a great spin!

SAVORY TUILES  adapted from Thomas Keller

1/4 Cup + 3 tablespoons (65 g) all purpose flour
1 tablespoon plus 1 teaspoon sugar
1 teaspoon kosher salt (2/3 teaspoon table salt)
8 tablespoons unsalted butter, softened but cool to the touch
2 large egg whites, cold
cracked black pepper

In a medium bowl, mix together the flour, sugar and salt. In a separate bowl, whisk the butter until it is completely smooth and mayonnaise like in texture. Using a spatula, beat the egg whites into the dry ingredients until completely incorporated and smooth. Whisk in the softened butter by thirds, until batter is creamy.

Preheat oven to 400 degrees F.

Make a 4" hollow circular stencil. Place the stencil on the silpat and spread batter in an even layer. There should be no holes in the batter. Lift the stencil and repeat the process to make as many rounds as you have moulds or to fill the silpat. Sprinkle with  freshly cracked black pepper.

Place silpat on a heavy baking sheet and bake for about 4 minutes until batter is set and you see it ripling from the heat. The cornets may have browned in some areas but they will not be evenly browned. 

Open the oven door and place the baking sheet on the door.***This will help keep the cornets warm as you roll them to prevent them from becoming too stiff to roll. Flip a cornet over the sheet pan and place a 4 1/2 inch cornet mould at the bottom of the round. If you are right handed, you will want the narrow side to your left. The tip of the mould should touch the lower left edge (7 o'clock) of the cornet.

Fold the bottom of the cornet and around the mould. Arrange the cornets, seam side down on the pan so they lean against each other to prevent rolling. Bake for another 2-3 minutes until cornets are golden brown. Remove from oven and cool for 30 seconds or so.
Gently remove the cornets from the moulds and cool for several minutes on a paper towel. Stores up to 2 days in an airtight container.

SMOKED SALMON AND AVOCADO FILLING
100g finely diced smoked salmon
1 small ripe avocado
olive oil
lemon juice
salt 
pepper

combine all ingredients just before serving and scoop into the cornets. Garnish with chives.  I served my cornets in little glasses on a bright plate. Enjoy!

Thursday, October 30, 2008

There's more to life than being a pizzaiolo...


So I tell myself, after trying it once and wasting a good piece of dough... So I quit! 
A cop out i know...
Pizza however, without the tossing, is a worthwhile endeavor... and truly produces great results. I started trying to make my own pizza dough about three years ago and I've never stopped making it since.  Sometimes I have pizza parties where most of the night I'm just by the oven, loading and unloading freshly baked pizzas which are the absolute best!
So when Rosa of Rosa's Yummy Yums proposed Peter Reinhart's pizza dough from the Bread Baker's Apprentice I was all for it!
I made one pizza with a tomato sauce base, italian sausage, portabello mushrooms, onions, mozzarella and basil.  The other pizza had pesto as the base, then topped with prosciutto, pears, gorgonzola, and mozzarella. The third pizza was smeared truffle oil then portabello, onions, taleggio and oregano. 

Okay, I'm going to make more of this on the weekend and I'll give the hand toss another go...
Thank you to Rosa for an excellent challenge and you can get the recipe for the dough here.


Monday, October 6, 2008

My birthday dinner

I like to make things immensely difficult for myself, almost killing myself every year right around the time of my birthday and it isn't about growing older and obviously I am not getting wiser either! At least not in this respect....Almost every year, I throw a theme dinner party for my birthday. A month before I already prepare my invitation and I have my menu and table setting practically planned out. I usually give my friends this time to get their costumes together.

Sounds like fun right? It is, but all the behind-the-scenes work keeps me up many nights labouring away for one night's glory. It's well worth it, especially with my friends who do go the distance with me. That's what I tell myself whenever my feet start to throb!

Through the years, I've gone through most of the world's cuisines. Those were the years when the food dictated the theme.  Then it all changed. I could no longer think of a cuisine to do. The creativity kicked in and I started doing things the other way around. I developed  a theme first and then the food followed. It was quite liberating and challenging. Most of what I was coming up with were reinterpretations of classics, of course based on ideas already thrown around by extremely talented blogger chefs all over the web. 

Last year I did a Zodiac party. This year I wanted to up the ante so I decided to go with artists.

My invitation got a lot of oohs and ahhs but I got a lot of complaints regarding the level of difficulty of the theme and was told that interpretations should be allowed. Then came the barrage of hilarious characters: (the non-Filipinos may not understand some of these) Raggedy Andy Warhol, Cherry Pie Picasso, Mango Van Gogh, Tenga ng Degas, Matisse Tessoro, Jonathan Livingston Chagall and Star for all Cezanne... 
But after all that, they actually came in great costumes! We had Degas (okay, wrong pigmentation, no facial hair and hat but that Jigs just didn't wear an old costume gives this three thumbs up! Thank god for his girlfriend!), Degas' ballerina (Oona, who lends all credibilty to Jigs!), Andy Warhol (Raggedy pants, Troy!), Jackson Pollock (Poor Jay, we had just drizzled what I thought was quick dry embossed paint on his tee only to find out it took 12 hours to dry!), Manet's Olympia (yours truly), the bride of Chagall (Why no goat, Suzy?) and my friend Jojo who came as an Easel (another three thumbs up for the effort! He hates costumes!)

Once I got my theme lined up, I started to think of how to present it
throughout the dinner. I wanted art, color and composition to really be central to my table setting. I decided to paint 10x14" canvasses in  different colors arranging them according to the color wheel. These were both placemats and thank you cards. Each place setting was marked by an easel I had made from cardboard and on these I laid out the place cards. My centerpiece was simply a floral arrangement of red carnations, yellow Lisianthus, hydrangeas and mini gourds that had  a nature-morte feel to it.

The menu cards were simplified.  No explanations were made. I just indicated the course and the artist who inspired the the direction so as not to give anything away. I wanted my guests to be able to discern why I had paired the artist with a particular course. 

For the appetizer, the Sunflowers of Van Gogh was my jump-off point.  I opted to make an uni (sea urchin) mousse with some fish roe.  The Uni was difficult to find as a storm had just hit the Philippines. I found it though through trips to 10 different stores. Perseverance pays off!!! And to boot, I found a fresh delivery. It made an excellent and sweetly delicate mousse. 

I followed this with a Cream of Portobello that I had made with a subtle but rich vegetable broth.  The broth actually heightened the taste of the mushrooms---much more so than if i had used water or YIKES a chicken cube!

I could not scan a label of a new campbell's soup can as they look slightly different today than they did when Andy Warhol painted them so I tried as best I could to replicate them on photoshop. My font wasn't quite right but it got the soup across! My friend Troy came as Andy Warhol and we had a hoot having him pose
 with his "creation!"

The next course was the Salad and my inspiration
 came from Picasso.  I had always wanted to make a puff ball with a salad hidden like a 
treasure inside as described by Richard Bertinet in his book, Dough. But how to do the puff ball and connect it to an artist? Painting picasso's dove of peace on the puff! There is no more profound explanation than it was pretty... 

The next course fish, proved to be tricky. Color was the primary association here and Rothko was the artist. I had one guest, Carlo, who was allergic to crustaceans so my original idea of a lobster bisque en gelee would have had one fatality!
I opted to do a Soupe de Poissons en Gelee with a rouille that was slathered on one end. This gave me the most trouble as the gelatin didn't want to set properly. 6 packets later and a lot of freezer action, it finally came together. It was interesting but I still prefer it the classic way as a warm soup with the crusty bread and loads of gruyere! 


The meat course was dedicated to Mondrian.  My original thought was to make a twin lasagna of beet pasta with the meat sauce and a little bechamel then create a layering of vegetables
 thinly sliced such a squash sandwiched with bechamel and cheese.  I didn't have the time to make the lasagna so I just used my squarish, grid-like fondue plates and seared a striploin steak over a red pepper coulis and a side of roasted potatoes in duck fat.

The last course was a panna cotta a la pollock. I had half mounds of panna cotta mildly flavoured with vanilla beans and lemon rind drizzled with dark chocolate ganache and an orange syrup. Here we have Pollock matched with Pollock. Much as I love dessert, I thought it was, hands down, the infinitely inferior Pollock!

I loved all the effort and detail I put into this party but i love that my friends indulge me at least once a year and take the path of whimsy. To them I say, merci. Except Carlo, who didn't come at the last minute... =)


Sunday, August 31, 2008

Clearly Eclairs!

Daring bakers--they've done it again... and again and again from what I've gathered!

MeetaK and Tony Tahhan chose a great dessert for the August challenge--- the eclair. Though relatively simple and quick to make, it still requires a bit of attention to get it right.  

I am not the biggest fan of eclairs, more because of the pastry cream and less because of the pastry. I love choux pastry and would often make profiteroles.  I'd fill them in with ice cream and then pour a lovely chocolate sauce over it.

But when Meeta announced we would be doing Pierre Herme's recipe...I was quick to put aside my dislike for pastry cream and embrace eclairs.  My cousin Pia and I were having a baby shower for two of our cousins so I thought that these eclairs would make a nice dessert for the party.

I started out by making the pastry cream. I essentially followed the recipe as is but removed the chocolate and I boiled my milk with a vanilla bean. I also lessened the sugar. I loved the resulting cream but I did find it too rich.

Next I made the chocolate sauce. I wondered why I had to make a chocolate sauce that went into a chocolate glaze when the ingredients were basically the same.  But fine... let's not question the master.

Lastly I made the chocolate glaze.  I used a dark chocolate deeply flavoured with orange.  It was divine! Whatever questions I had about the sauce I tossed out the window!

The next morning, I made the pastry. I noticed the pastry wasn't cooked enough so I kept the trays in for another good 10 minutes. I rotated the trays twice more to even the browning.
I was running late and didn't want soggy eclairs so I put each of the components in individual containers and brought them to the party at my cousin's barely opened restaurant. I actually filled them and glazed them there. Before filling them though I lightened the pastry cream with some cream which I had to whip by hand with a fork as my cousin didn't have a mixer in the place!
All's well that end well and these eclairs ended well!
Thank you Meeta and Tony for a great recipe!
Check out the other daring bakers here.

Pierre Hermé’s Chocolate Éclairs
Recipe from Chocolate Desserts by Pierre Hermé
(makes 20-24 Éclairs)


• Cream Puff Dough (see below for recipe), fresh and still warm


1) Preheat your oven to 375 degrees F (190 degrees C). Divide the oven into thirds by
positioning the racks in the upper and lower half of the oven. Line two baking sheets with
waxed or parchment paper.


2) Fill a large pastry bag fitted with a 2/3 (2cm) plain tip nozzle with the warm cream puff dough.
Pipe the dough onto the baking sheets in long, 4 to 41/2 inches (about 11 cm) chubby fingers.
Leave about 2 inches (5 cm) space in between each dough strip to allow them room to puff.
The dough should give you enough to pipe 20-24 éclairs.


3) Slide both the baking sheets into the oven and bake for 7 minutes. After the 7 minutes, slip the
handle of a wooden spoon into the door to keep in ajar. When the éclairs have been in the
oven for a total of 12 minutes, rotate the sheets top to bottom and front to back. Continue
baking for a further 8 minutes or until the éclairs are puffed, golden and firm. The total baking
time should be approximately 20 minutes.


Notes:
1) The éclairs can be kept in a cool, dry place for several hours before filling.


Assembling the éclairs:


• Chocolate glaze (see below for recipe)

• Chocolate pastry cream (see below for recipe)


1) Slice the éclairs horizontally, using a serrated knife and a gently sawing motion. Set aside the
bottoms and place the tops on a rack over a piece of parchment paper.


2) The glaze should be barely warm to the touch (between 95 – 104 degrees F or 35 – 40
degrees C, as measured on an instant read thermometer). Spread the glaze over the tops of
the éclairs using a metal icing spatula. Allow the tops to set and in the meantime fill the
bottoms with the pastry cream.


3) Pipe or spoon the pastry cream into the bottoms of the éclairs. Make sure you fill the bottoms
with enough cream to mound above the pastry. Place the glazed tops onto the pastry cream
and wriggle gently to settle them.


Notes:

1) If you have chilled your chocolate glaze, reheat by placing it in a bowl over simmering water,
stirring it gently with a wooden spoon. Do not stir too vigorously as you do not want to create
bubbles.


2) The éclairs should be served as soon as they have been filled.


Pierre Hermé’s Cream Puff Dough
Recipe from Chocolate Desserts by Pierre Hermé
(makes 20-24 Éclairs)

• ½ cup (125g) whole milk

• ½ cup (125g) water

• 1 stick (4 ounces; 115g) unsalted butter, cut into 8 pieces

• ¼ teaspoon sugar
• ¼ teaspoon salt

• 1 cup (140g) all-purpose flour

• 5 large eggs, at room temperature


1) In a heavy bottomed medium saucepan, bring the milk, water, butter, sugar and salt to the
boil.


2) Once the mixture is at a rolling boil, add all of the flour at once, reduce the heat to medium
and start to stir the mixture vigorously with a wooden spoon. The dough comes together very
quickly. Do not worry if a slight crust forms at the bottom of the pan, it’s supposed to. You
need to carry on stirring for a further 2-3 minutes to dry the dough. After this time the dough
will be very soft and smooth.


3) Transfer the dough into a bowl of a mixer fitted with the paddle attachment, or using your
handmixer or if you still have the energy, continue by hand. Add the eggs one at a time,
beating after each egg has been added to incorporate it into the dough.
You will notice that after you have added the first egg, the dough will separate, once again do
not worry. As you keep working the dough, it will come back all together again by the time you
have added the third egg. In the end the dough should be thick and shiny and when lifted it
should fall back into the bowl in a ribbon.


4) The dough should be still warm. It is now ready to be used for the éclairs as directed above.

Notes:

1) Once the dough is made you need to shape it immediately.


2) You can pipe the dough and the freeze it. Simply pipe the dough onto parchment-lined baking
sheets and slide the sheets into the freezer. Once the dough is completely frozen, transfer the
piped shapes into freezer bags. They can be kept in the freezer for up to a month.


Chocolate Pastry Cream 
Recipe from Chocolate Desserts by PierreHermé


• 2 cups (500g) whole milk

• 4 large egg yolks

• 6 tbsp (75g) sugar

• 3 tablespoons cornstarch, sifted

• 7 oz (200g) bittersweet chocolate, preferably Velrhona Guanaja, melted

• 2½ tbsp (1¼ oz: 40g) unsalted butter, at room temperature


1) In a small saucepan, bring the milk to a boil. In the meantime, combine the yolks, sugar and cornstarch together and whisk in a heavy‐bottomed saucepan.


2) Once the milk has reached a boil, temper the yolks by whisking a couple spoonfuls of the hot milk into the yolk mixture.Continue whisking and slowly pour the rest of the milk into the tempered yolk mixture.


3) Strain the mixture back into the saucepan to remove any egg that may have scrambled. Place the pan over medium heat and whisk vigorously (without stop) until the mixture returns to a boil. Keep whisking vigorously for 1 to 2 more minutes (still over medium heat).Stir in the melted chocolate and then remove the pan from the heat.


4) Scrape the pastry cream into a small bowl and set it in an ice‐water bath to stop the cooking process. Make sure to continue stirring the mixture at this point so that it remains smooth.


5) Once the cream has reached a temperature of 140 F remove from the ice‐water bath and stir in the butter in three or four installments. Return the cream to the ice‐water bath to continue cooling, stirring occasionally, until it has completely cooled. The cream is now ready to use or store in the fridge.


Notes:
1) The pastry cream can be made 2‐3 days in advance and stored in the refrigerator.

2) In order to avoid a skin forming on the pastry cream, cover with plastic wrap pressed onto the cream.

3) Tempering the eggs raises the temperature of the eggs slowly so that they do not scramble. 

Chocolate Glaze 
Recipe from Chocolate Desserts by Pierre Hermé
(makes 1 cup or 300g)


• 1/3 cup (80g) heavy cream 

• 3½ oz (100g) bittersweet chocolate, finely chopped

• 4 tsp (20g) unsalted butter, cut into 4 pieces, at room temperature

• 7 tbsp (110g) Chocolate Sauce (recipe below), warm or at room temperature 


1)In a small saucepan, bring the heavy cream to a boil. Remove from the heat and slowly begin to add the chocolate, stirring with a wooden spoon or spatula.


2) Stirring gently, stir in the butter, piece by piece followed by the chocolate sauce. 


Notes: 

1) If the chocolate glaze is too cool (i.e. not liquid enough) you may heat it briefly in the microwave or over a double boiler. A double boiler is basically a bowl sitting over (not touching) simmering water.


2) It is best to glaze the eclairs after the glaze is made, but if you are pressed for time, you can make the glaze a couple days ahead of time, store it in the fridge and bring it up to the proper temperature (95 to 104 F) when ready to glaze. 


Chocolate Sauce
Recipe from Chocolate Desserts by Pierre Hermé 
(makes 1½ cups or 525 g)


• 4½ oz (130 g) bittersweet chocolate, finely chopped 

• 1 cup (250 g) water

• ½ cup (125 g) crème fraîche, or heavy cream 

• 1/3 cup (70 g) sugar 


1) Place all the ingredients into a heavy‐bottomed saucepan and bring to a boil, making sure to stir constantly. Then reduce the heat to low and continue stirring with a wooden spoon until the sauce thickens.


2) It may take 10‐15 minutes for the sauce to thicken, but you will know when it is done when it coats the back of your spoon. 


Notes: 

1) You can make this sauce ahead of time and store it in the refrigerator for two weeks. Reheat the sauce in a microwave oven or a double boiler before using.

2) This sauce is also great for cakes, ice-cream and tarts.

Thursday, July 31, 2008

The verdict ++


So today I had my girlfriends over for lunch. I wanted to cook up a storm for two of my oldest and best girlfriends. Having been so busy the past couple of months, I had been dying to test out so many recipes. As I plotted and planned a hefty 6 course meal, I could not help but give in to the exhilaration of being in the kitchen.

I have been wanting to test the shrimp chorizo that I read about in Ideas in Food. As activa is not readily available to me, i used egg whites. It formed easily enough but it didn't feel as firm when I sliced it. The shrimp chorizo needed to be poached which was difficult as well as I could not keep the temperature constant at 52.5 centigrade. It turned out okay but I will have to rethink my procedure before I try it again.

I also made a goat cheese mousse piped over a bed of pine nuts and dri
zzled with honey. Yum! I served the mousse on little spoons alternating them with the chorizo that I drizzled with olive oil.  I also made little 
loaves of white bread that I sliced and presented in the middle of the spoons. It made such a  pretty photo!

For the next course, I served phyllo wrapped towers of foie gras, a saute of portabello and porcini mushrooms, and gruyere over a bed of mesclun with a fig vinaigrette. Whew!

This was followed a scallop ravioli in butter ginger sauce.  This is one of my favorite recipes.  I always make this using a technique that I saw in Master Class, Lessons with the World's Greatest Chefs.  You take flat leaf parsley and incorporate this into the pasta.

I tried making the Mojito Sorbet from Dragon's Kitchen which was inspired by David Lebovitz' Lime Sorbet and Mojito Granita. I have to applaud her combination concoction. It was not sweet but all the flavors are present. It was so refreshing and the rum kick was not bad either!

I pan fried some striploin to a crisp caramelization while keeping it pink inside. Arzak often serves steaks with vanilla roasted potatoes. I've been so curious to try this. There was a delicate flavour that made it different but I didn't feel like it enhanced  the meat nor the potatoes. I think I still prefer good old reliable garlic! 

And for the piece de resistance...the Filbert Gateau!  It was still a little too sweet for me but it was still good. No one could finish one whole mini cake though... and my 8" brick is still untouched!


Wednesday, July 30, 2008

After dilly dallying and dragging my feet for a month the delays are finally over...because I ran out of time and the deadline is here! Presenting the daring bakers July challenge: The Filbert Gateau with Praline Buttercream...whew! Chris of Mele Cotte chose Carol Walters' daunting recipe.  
After my last fiasco with a nutty genoise, I wanted to be absolutely certain that I would not make the same mistakes.  This time I promised myself, I'd be so careful, everything would turn out beautifully... Heck, it wouldn't be daring if life in the kitchen were really all that simple!
 I made one 8" cake and three 2 1/2" cakes that I wanted to serve individually to some girlfriends coming for lunch tomorrow. The three mini cakes were done in no time and I left the 8" longer. When I tried to invert them, I realized that the 8" cake, was still rather uncooked... and now had an alien handprint on the center.  Can I change the theme for lunch to Roswell? HMMM.... 
I put the cake back in the oven and went merrily along making the next step. The glaze.
I realized I bought dried apricots instead of preserves so I looked up a recipe, and out came a 4 hour preserve. Was that easier than stepping out and buying  a bottle? Probably not, but that's so typical of me! So out came the crock pot that has never been used. My mother should be so proud but she would just exclaim with exasperation, "you're crazy!" And while this exchange was going on in my head I realized that my cake was starting to burn! Talk about action in the kitchen!
So while The preserve was cooking, I tackled the praline buttercream next. It's been very interesting making different kinds of buttercream. In this one, we add the meringue into creamed butter. It came together so easily I was amazed.  Now I have a new favorite buttercream method!
All in all, I like this cake though honestly I have not eaten it. So where is that statement coming from? I tasted all components individually (lots of fingers in the buttercream!) and they don't seem as sweet which suits me perfectly. I'm waiting to serve the 3 mini cakes for lunch  tomorrow and though I frosted and decorated my 8" BRICK cake, I am scared to try it!
More tomorrrow on the verdict!

Thank you to chris for another great challenge! You can find the recipe for the Filbert Gateau with Praline Buttercream here.